
Module 1 - Brake Pipes
<26th August 2005>Brake Pipes:
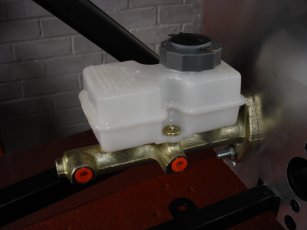
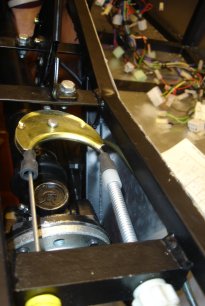
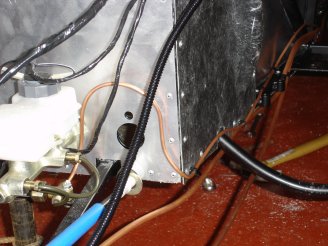
First thing to get done with the braking system is to install the master cylinder. This bolts directly on to the pedal mounts with the prongs for the cylinder going through and connecting directly to the brake pedal. As you can see in the picture this has the brake fluid resovior built on to the top of it and there are two outlets (with orange plugs in), one for the front brakes and one for the rear, the balance is preset to an optimal percentage and this not adjustable.
<30th August 2005>
Time to do the brake pipes, i've been apprehesive about the brake pipes as obviously they're a delicate job and there's no room for error. You really can't afford to mess up as you'll end up with brake failure and inevitablly a crashed car! So went to the local motor shop and asked if they had any brake pipe bending pliers, he said they didn't but he recommended against them and that the best way to go about bending the pipes is very slowly and carefully on you knee round some form of bar.
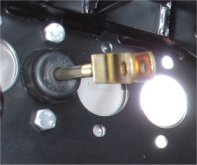
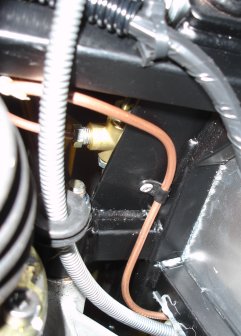
 So i headed for the garage and set about doing just that. The brake pipes are fairly flexible and not too hard to bend but i was extra cautious as i wanted to make sure the bends were as smooth as possible. The first pipe to bend was the smallest, as you can see for the picture is goes from the secondary (rear brakes but furthest forward in the Master cylinder) port on the master cylinder and then onto the T Piece that holds the brake warning. This required a series of tight bends to fit in but i got it in ok and my first brake pipe was bent and in place!
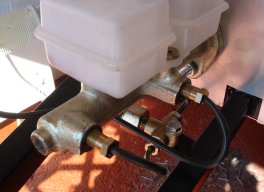
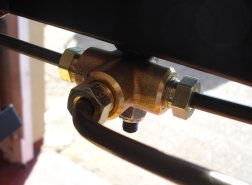 From there i went on to fit the pipe from the Primary Port (front brakes) on the Master cylinder to the front 3-way connector bolted to the front bar of the chassis. This requires a quick double back under the master cylinder, then running it along the inside of the chassis to the top and then all the way along to the front. There was just about enough pipe so the route and bending had to be planned pretty rigorously for this one. Once it was in place we could take it off to drill the holes for the supporting P-Clips to be riveted to the chassis. Once in the brake pipes are really well supported.
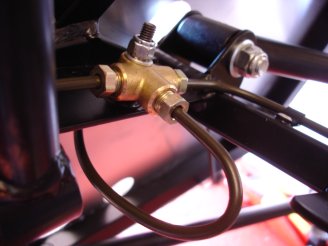
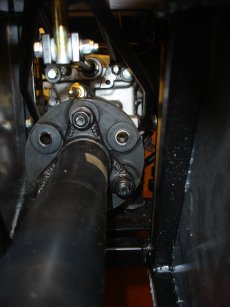
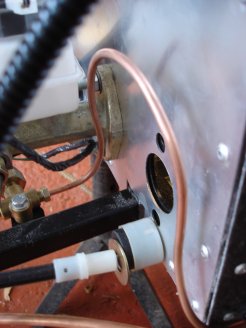
 From either side of the front 3 way connector pipes of equal length go out and connect to the Flexible brake pipes that then go to the brakes themselves. As you can see from the picture, there is a chassis mounting that locates this connection. So either side of the 3-way connector the brake piipes are fed along the chassis, bent around the corners and then taken down to a sweeping bend that then screws into the flexible pipe.
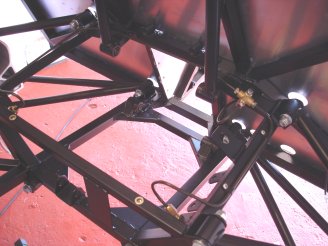
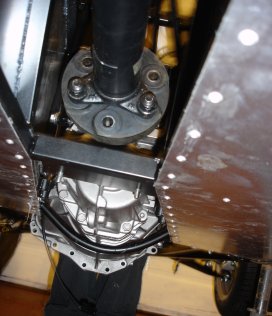
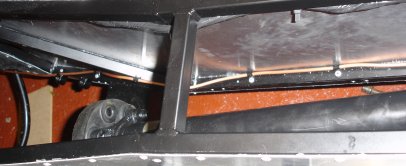
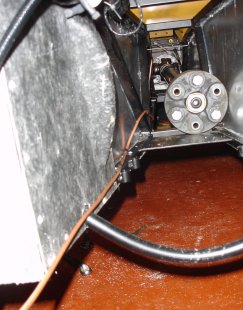
With the front brakes out the way it was time to move onto the back. There was one really long pipe for this purpose as it has to go from the T-Piece with the brake warning sensor right under the drivers side of the chassis and connect to the Rear 3-Way connector bolted between the rear suspension and the diff mountings. As you can see from the picture there were a couple of minor bends required to get the brake pipe under the chassis but then it was just a case of riveting P-Clips to the underside to keep the pipe supported. At the rear of the chassis the pipe is then bended up to follow some of the chassis members round and then looped in a U-Bend to screw into the middle port of the rear 3 way connector as you can see in the pictures below.
<13th Decemeber 2005>
Decided to move the pipes from underneath the car! I've never been happy with the location of the fuel and brake pipes along the drivers seat. So i stripped the pipes out and chopped both ends off the brake pipe, ready to give to my local motor shop to make me up a new brake pipe!
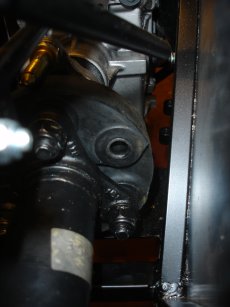
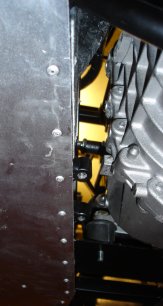
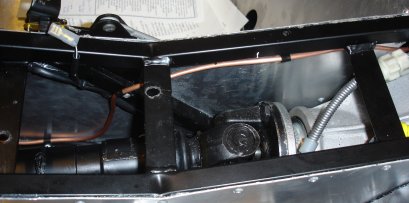
With that done i could now work out the new brake pipe routing. I wanted to keep as much of the brake pipe in the prop tunnel as possible as to sheild it from and bumps or stones in the road. With this as my main requirement and given the availability of the chassis rails (the upper drivers side was taken by the loom) i selected the top of the lower drivers side rail to run the brake pipe along. For this to work i needed to see how much clearance i would have with the gearbox in place. So as you can see from the pics below i did just that!
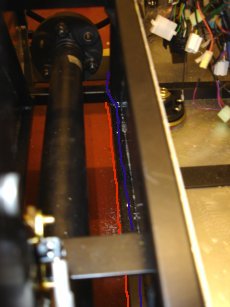
With that showing i had plenty of room i set about marking the route with the pipe starting along the front of the pedal area and then entering the tunnel. It would then follow the tunnel on the upper edge all the way along as marked with a blue line on this picture.
Then it will go up to the top nearing the handbrake, and then through and round to the tee junction as detailed below.

And this path enables the brake pipe to stay above the chassis the whole route
<20th Decemeber 2005>
Got the new brake pipe made up from my local motor shop and they'd done a great job! each end was nicely finished with new connectors to match the ones i'd given them already connected. So taking that to the garage i started work on planning the layout so i could drill the holes. I started at the back as this would be the tricky part. Forming a nice U turn bend after the connector i was able to double back against the right hand rail, this will allow me to keep the pipe away from the handbrake cable. A drill straight through the flat plate behind the T-piece allowed me to rivet up from underneath, as in the pic below left. The follow along and turn into the tunnel at the top right, as in the pic below right.
Then it was just a case of working along the top rail until i would bump into the wiring loom and then hopping down to the inside top edge of the bottom rail. There are a couple of cross rails nearer the front i needed to go around and i kept it high at this point as to leave room for the fuel pipes to run under.
<7th January 2006>
Finally got around to fitting the remaining part of the brake pipe to the front of the tunnel out to the T-joint. This was pretty straight forward i used the brake pipe supports as i ran out of P-clips and i wish i had used them earlier, they're very neat.
 Copyright ©2012
Kevin Baldwin
Copyright ©2012
Kevin Baldwin


