
Module 2 - Drive Shaft
Module 2 Build:
<7th September 2005>
Drive Shaft:
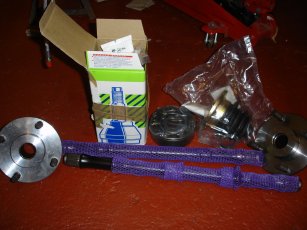 Not a great start to the drive shafts! I read through instructions in the manual and then started collecting the parts together. There seemed to be something wrong and then i realised that i didn't seem to have any outer hubs! Hunting through the shelves concluded that they had not been included in the kit. I collected everything else together and all seems in place apart from the outer hubs and the retaining nut. So i have sent a mail off to Gavin at Westfield and i await patiently his response.
 This has put a halt to the drive shafts and rear hubs for now though!
<8th September 2005>
 Spoken to Westfield and they're going to get the outer hubs out to me as soon as they get them in. So hopefully that will be soon.
 Decided to start work on the drive shafts anyway and get them ready for the hubs as soon as i get them. So i took the drive shaft and the lobro joints out and attached the first one to the end of the shaft. These are a struggle to get all the way in so i opened my bench vice just enough for the end of the shaft to go through and then tapped the top with a wooden mallet.
 After a while it goes through far enough to allow the circlip to be placed into it's groove with some external circlip pliers.
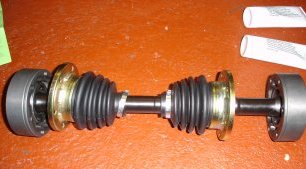
Next on it the dust cover and gaiter. The end of the rubber gaiter is a pain to get over the end of the shaft but with some pursausion from a flat screwdriver i managed to ease it over. As you can see from the photo the Lobro joint is a heavy metal disc with large barings allowing it to twist and turn in all directions. Next on is the gaiter for the other and and so this needed to be put on backwards which made it even harder!! But once on i just needed to follow the same procedure as before to get the other Lobro on.
After a while it goes through far enough to allow the circlip to be placed into it's groove with some external circlip pliers.
Next on it the dust cover and gaiter. The end of the rubber gaiter is a pain to get over the end of the shaft but with some pursausion from a flat screwdriver i managed to ease it over. As you can see from the photo the Lobro joint is a heavy metal disc with large barings allowing it to twist and turn in all directions. Next on is the gaiter for the other and and so this needed to be put on backwards which made it even harder!! But once on i just needed to follow the same procedure as before to get the other Lobro on.
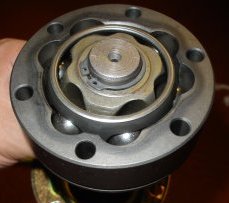
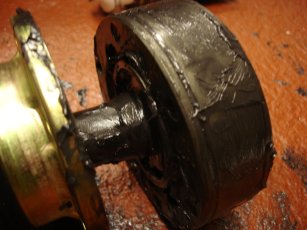 Once all the bits are on and the shaft is made up i needed to put the graphite grease in the Lobro joints. There is a big tube of the grease and it states to use a whole tube on each joint. With the amount of movement in these joints i can see why but theres a whole lot if grease to use and as you can see from the picture it makes a pretty good mess! One word of warning though, be carefull when applying the grease as the joint has a great deal of movement and once it moved so much that one of the barings came out. It was then a big job to get it all re-aligned so i could get it all back together. It's all done though and the shaft is now ready to attach to the prop shaft and the outer hub when it arrives.
<12th September 2005>
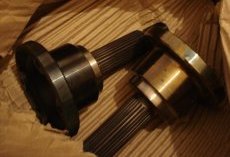 Had another courier note waiting for me when i got home from work. Thankfully again they had dropped it at my neighbours house. So i popped over and as you can see from the picture i have my out hubs!! Unfortunately the retaining washer and nut were not included so thats going to be another call to Westfield tomorrow morning! But at least i can get to work on the drive shaft tomorrow and hopefully i'll get the most of that complete tomorrow evening.
<13th September 2005>
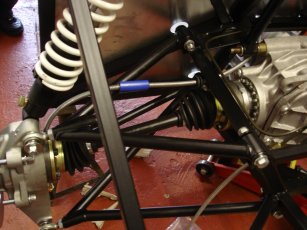 With the outer hubs now in my hands i was able to get to work to complete the drive shaft. This involved screwing the left outer hub onto the shaft i had already put together. The outer hub attaches to one of the Lobro joints and then is fed through the upright into the hub i attached earlier making sure the grooves fit in together. Then the Lobro on the other end of the shaft is screwed directly into the side of the differential. The same steps were followed the other side and soon both shafts were attached and the rear section is looking more and more complete by the day! I am still waiting on the retaining nuts from westfield but hopefully they will arrive any day. They're not holding me up anyway, next job is to get the Fuel Pipes and Pump in place.
<16th September 2005>
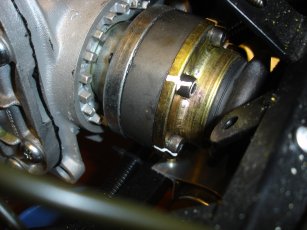
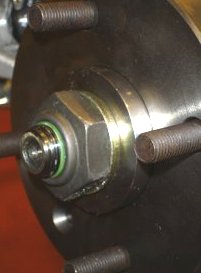 Fitted the retaining washer and nut, this simply fixes onto the ends of the outer hubs that protrude through the brake disc. They are right or land hand threaded depending on the side of the car, they always do up in the same direction the wheels will turn when going forward. This makes sense as it will always keep them tight rather then undo them. As they are attached to the drive shaft it gave me an excellent opportunity to test the hand brake to stop them moving when i tighten. This worked perfectly but you need to tighten them to 250ftlbs and this cannot be achieved until Module 5. So for now i just did them up as tight as i could, interestingly the hand brake held it dead still even when applying as much force as i could, so thats good news!
<9th December 2005>
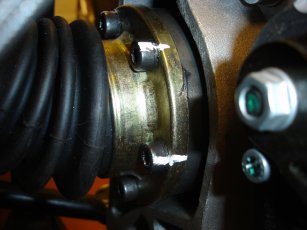
As with the suspension I took this opportunity to torque tighten all the bolts on the car. This included both ends of the drive shafts. As you can see from the picks below i followed the same procedure as the suspension to mark the positions for the bolts after tightening to allow easy checking if any of them move and loosen.
 Copyright ©2012
Kevin Baldwin
Copyright ©2012
Kevin Baldwin


